
Lightgun Lichtknarre > LK 11 – Corpsulator – Gunshell > Build guide
What is going on here?
Here you can find out all the information on how to build the Wii gun cradle for Lichtknarre. If you don’t know what Lichtknarre is, take a look here:
https://geekonarium.de/en/lichtknarre-lightgun/
The Wii gun shell for Lichtknarre is a 3D print and you can use it with the 4 and 2 LED tracker from Lichtknarre. If you don’t know what these trackers mean, have a look here:
https://geekonarium.de/en/lichtknarre-lightgun-wii-4-led-tracker-plugin/
https://geekonarium.de/en/lichtknarre-lightgun-wii-2-led-tracker-plugin/
You can find more information about the gun cradle for Lichtknarre here:
https://geekonarium.de/en/lightgun-lichtknarre-lk-11-c-gunshell-for-3d-printing
What does the end product look like?
What do I need for this?
Foreword
As there are many 3D printers, materials and software out there, I can only speak from my own experience here and illustrate as best I can the building process I used. Try to stick to the specifications as much as possible. Various skills are required for this project. Of course, it is also good for beginners to implement projects that they have no experience with in order to learn. However, this requires more patience.
It also shows how to remove the support material and place the models in the 3D printer. This can of course be different on other devices.
Download
First, download the 3D print files.
3D printer specifications
Nozzle: 0.4mm
Optional:
Heated bed, enclosure
Default Cura Settings
- Overhang Angle: 65°
- Infill-Patterns: Lines
- Infill: 60%
- Slicing Tolerance: middle
- Print-Sequence: One at the time
- Wall Line Count: 3
Material
PLA+ is used for stability. Harder materials can also be used. I have no experience with resin printers. Not all components necessarily need PLA+, so these are marked again, which definitely need PLA+. Some of the parts are very delicate and must therefore be printed with PLA+ so that they have enough strength and do not bend or break.
Preparation
- It’s best to watch a few tutorials before you start:
- https://teachingtechyt.github.io/calibration.html
Tools
Saw, pliers, pump pliers, sturdy slotted screwdriver, screw clamp, hammer, superglue
What do I need to buy?
- Magnets: 6mm x 3mm (6 holes = 2 for the gun holster and 4 for the guncradle)
- Filament: PETG, PLA+
- Lenses. More infos here: https://geekonarium.de/en/lightgun-lichtknarre-lk-11-c-gunshell-for-3d-printing
Tests
Before you start 3D printing the guncradle, you should complete the following test print:
Temperature Tower
Please do your research.
https://www.youtube.com/results?search_query=temp+tower+3d+print
Stringing Test
Please do your research.
https://www.youtube.com/results?search_query=String+test+3d+print
Accuracy Test
https://www.thingiverse.com/thing:2484766
Try to stay within the tolerance of 0.2mm. Once you have achieved this, you should have no problems printing the gun cradle. Please calibrate with the same PLA+ or other materials you want to print with.
Clean up philosophy for support material
When it comes out of the 3D printer, only the support material needs to be removed properly. This must be done properly, otherwise certain mechanisms cannot function. Sanding or edges actually have to be reworked.
Nevertheless, for some components I point out how I have corrected certain things or removed the support material. This can be different for every printer. I will not explain every detail, which is self-explanatory.
It would also be good to have some masking tape on hand to protect against scratches before removing support material.
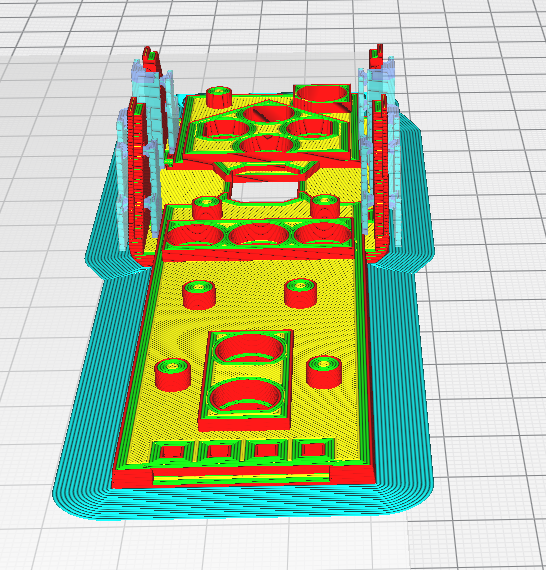
Placement
Pay close attention to the images when placing them. If the undersides of certain models are not placed correctly, some mechanisms may not work or certain things may not fit together. The blue marker in Cura identifies how much of a surface is flat on the print bed. Activate the Snap Rotate option in Cura. This will help you with the placement.
The placements are chosen so that the support material can be easily removed without breaking the 3D print.
The best is to print directly on the printer bed, because this gives a better look for the surfaces. If you print extra support material under the parts, this can lead to breakage during removal or other problems.
Magnets/Pins
Some parts can be fitted with magnets or pins. Some parts you can use Magnets or Pins and for some parts you only can use Pins. This will be indicated in the assembly section.
3D printing process
Once everything has been set up correctly and all preparations have been completed, 3D printing can now begin. If no special specifications are made, the placement can be taken from the images or the default settings for Cura can be used. I would recommend printing in exactly the same order as described in the tutorial, as you can then assemble everything on the side. Try to replicate the placement shown in the pictures. This is very important to avoid deformation. In addition, the placements are chosen so that the surfaces look as good as possible.
Let’s go!
Top/bottom plate
Files
- ButtonCoverUpper.stl
- ButtonCoverLower.stl
Special Cura settings
Infill: 100%
Material
PLA+
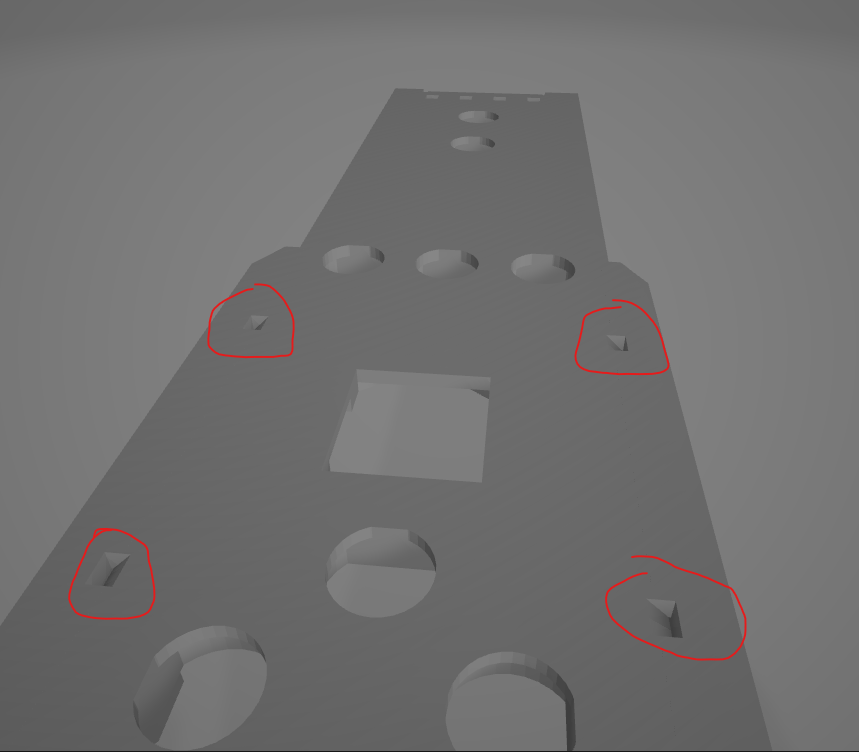
Placement
Make sure that everything lies flat on the print bed.
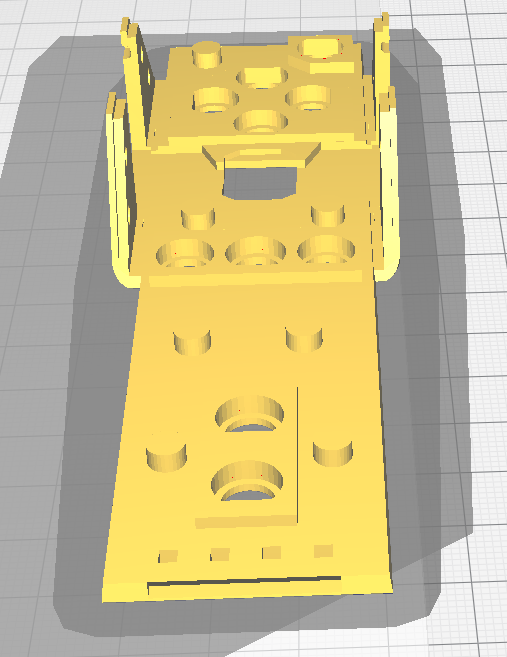
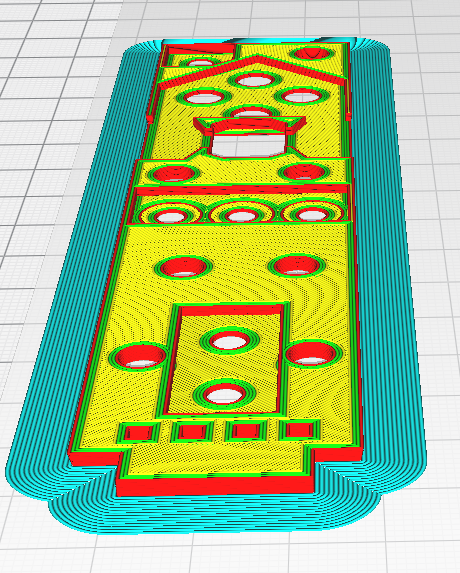
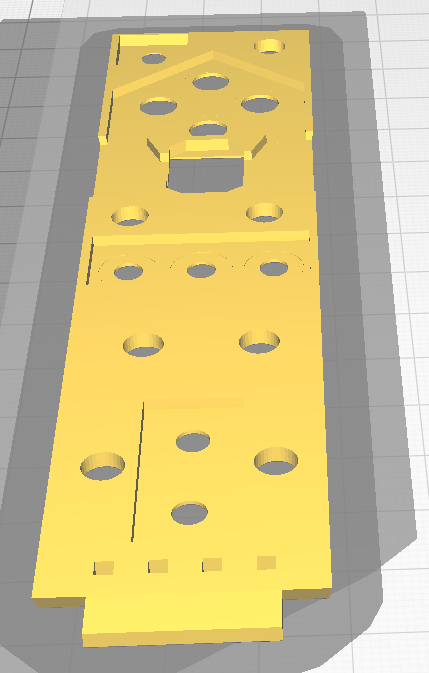
For ButtonCoverUpper.stl, when finished printing, there should be four hole indentations as below. If the holes aren’t showing, you may have included an unwanted support layer in those locations. You could grab a small screwdriver/x-acto knife to remove excess material, or re-print without support in those locations.
Side A-Button-Blends
Files
- ButtonCoverUpperLeftBlend.stl
- ButtonCoverUpperRightBlend.stl
Special Cura-settings
Infill: 100%
Material
PLA+
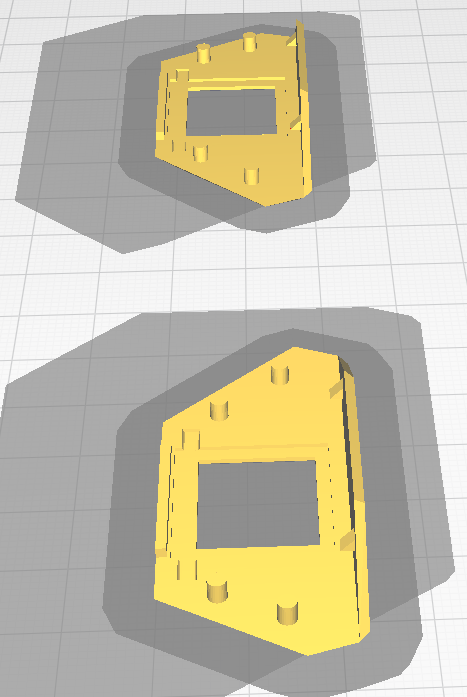
Placement
Make sure that everything lies flat on the print bed.
Side A buttons
Files
- ButtonALeft.stl
- ButtonARight.stl
Special Cura-Settings
Infill: 100%
Material
PLA+
Placement
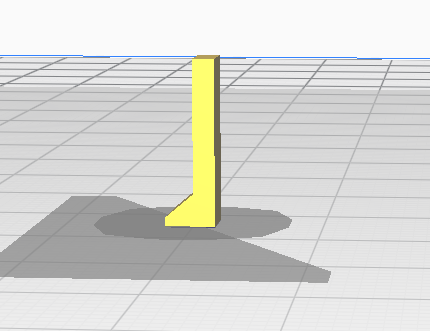
Make sure that everything lies flat on the print bed, as shown in the picture.
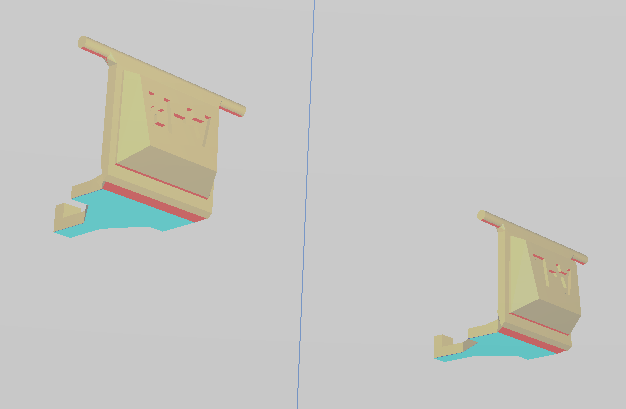
Remove support material
Use the snipping pliers to cut exactly where the blue lines are in the picture. This helps to remove the support material so that the pins bend. Do not cut too deep.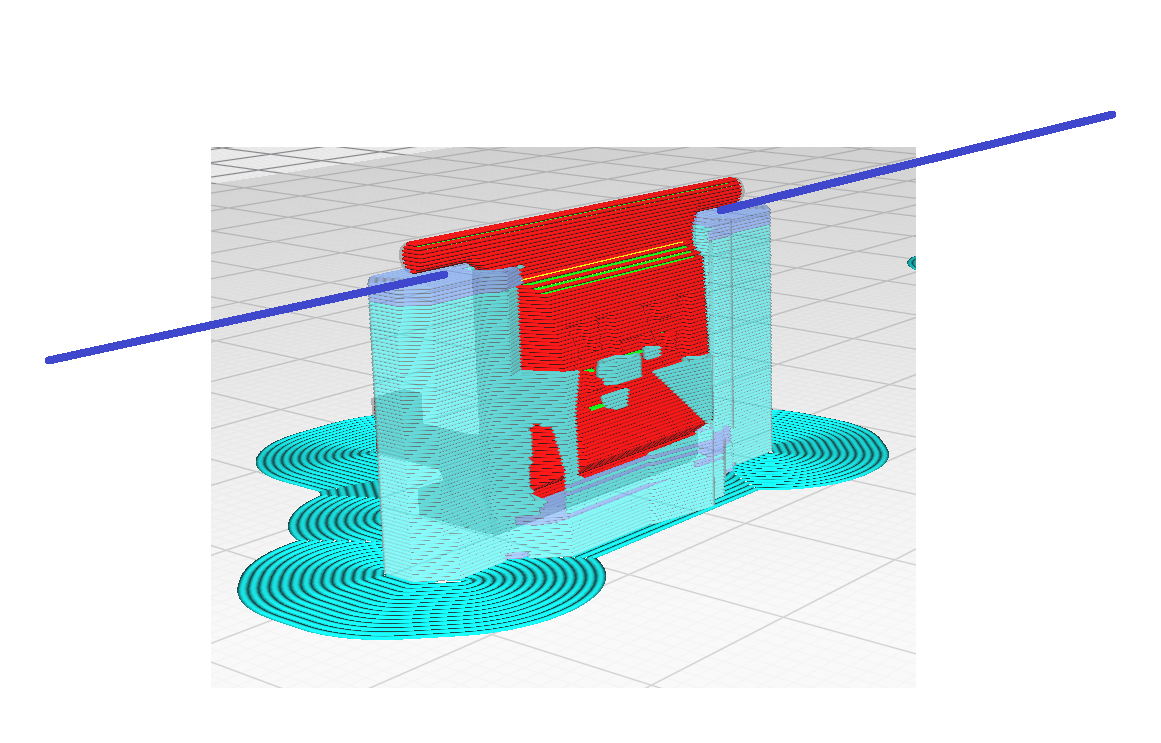
More Infos in the remove support-material section of this tutorial! Videos etc.
Make sure that there is no material residue on the pins. Sand smooth if necessary, otherwise the click mechanism will not work properly. However, do not remove too much material and do not bend the pins.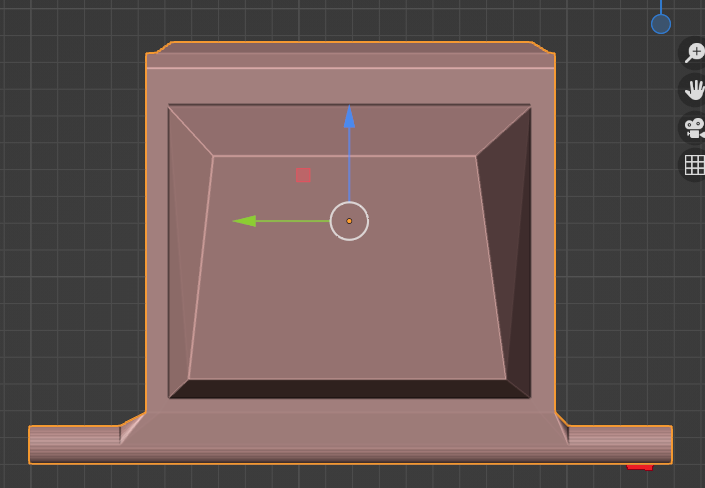
Button A
Files
- ButtonA.stl
Special Cura-Settings
Infill: 100%
Placement
Make sure that everything lies flat on the print bed, as shown in the picture.

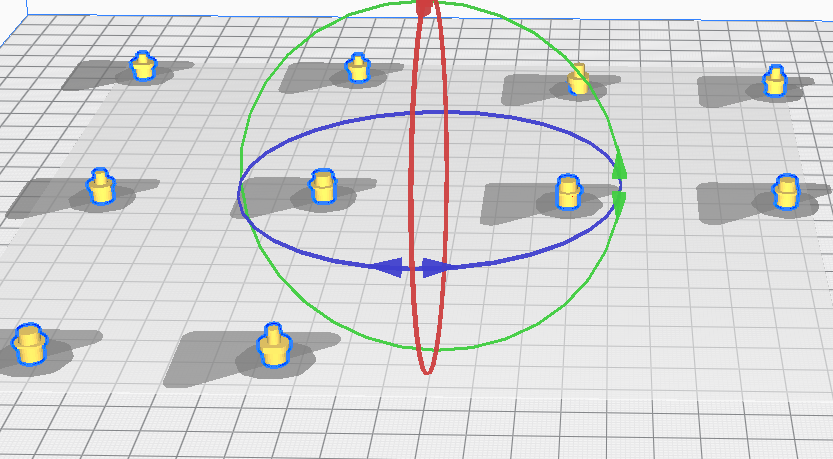
All Other Buttons Corresponding to Wiimote
Files
- Buttons folder/STL’s except those already printed ie everything except ButtonA.stl, ButtonALeft.stl & ButtonARight.stl
Special Cura-Settings
Infill: 100%
Placement
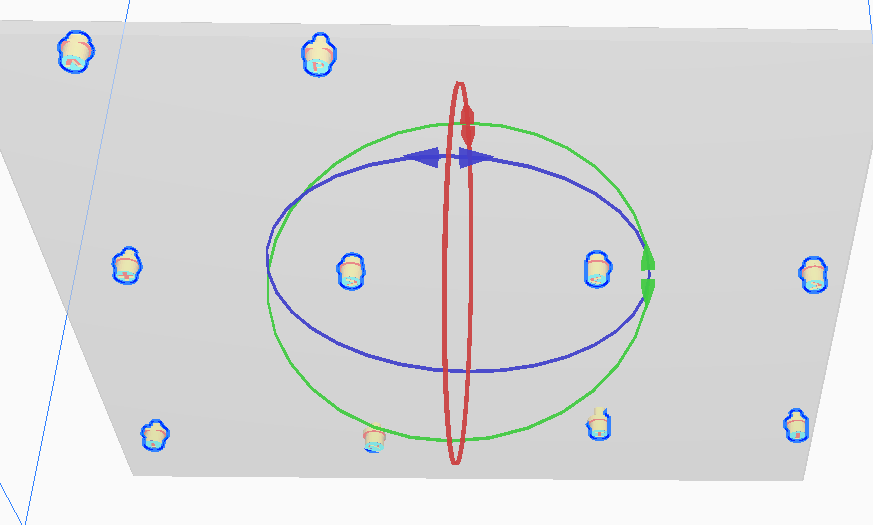
Make sure that everything is flat on the print bed, as in picture 2. Labels from the buttons must be facing down. Make sure that the areas are marked in blue when the label sides are on the print bed. Place the buttons far enough apart so that the print head does not interfere with the others. Drag each button individually into Cura, so you can make sure that one button is printed after the other if you have set the “Print Sequence” setting to “One at the time”. Whenever you import a new button into Cura, it will be printed next.
Remove support material
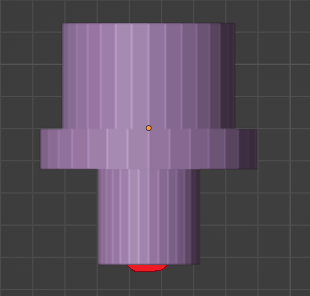
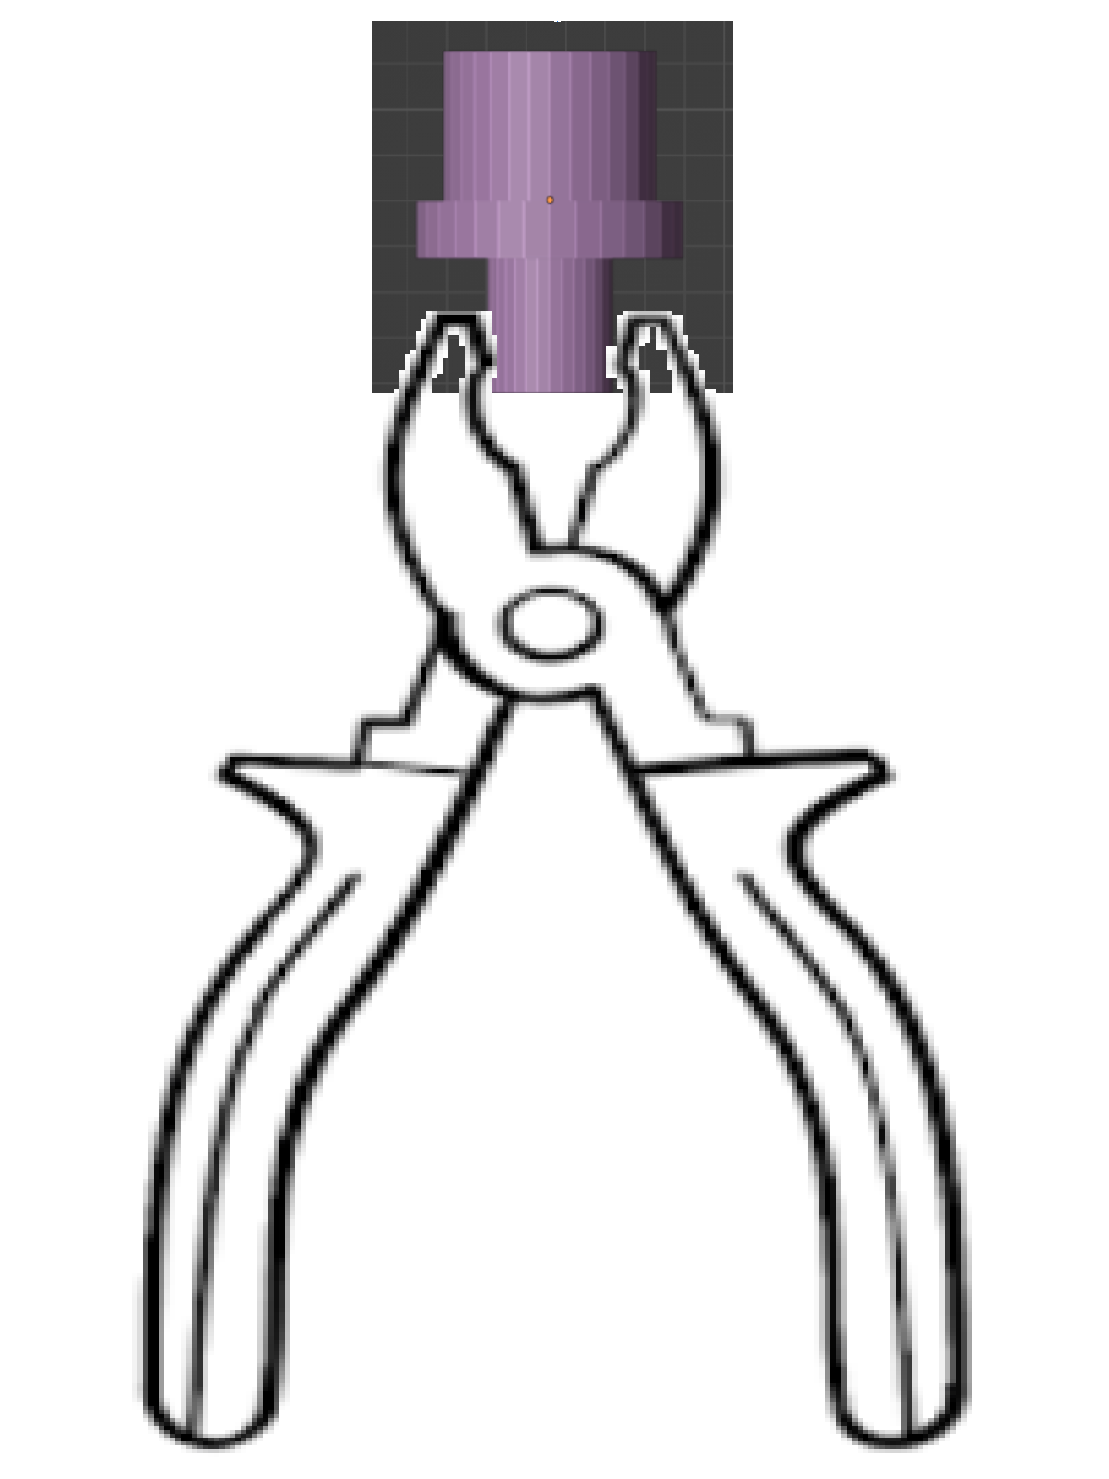
Buttons can have excess material on the pin, which can either be filed off or pressed together with pliers until it fits into the hole.
More Infos in the remove support-material section of this tutorial! Videos etc.
Start assembling your finished prints while printing what’s left below
Now that you’ve finished the above prints, you can assemble the button cover while waiting for the other big pieces to print below. Refer to the last page of this doc with the “Assembly” video from 00:39 to 1:03 minutes to follow the assembly of the button cover. Slow the video down if necessary to pinpoint the pieces you have already printed. When placing wiimote button prints in their respective holes, be careful not to confuse wiimote button 1 and 2 since they look really similar. Online search a wiimote button layout to know which button goes where.
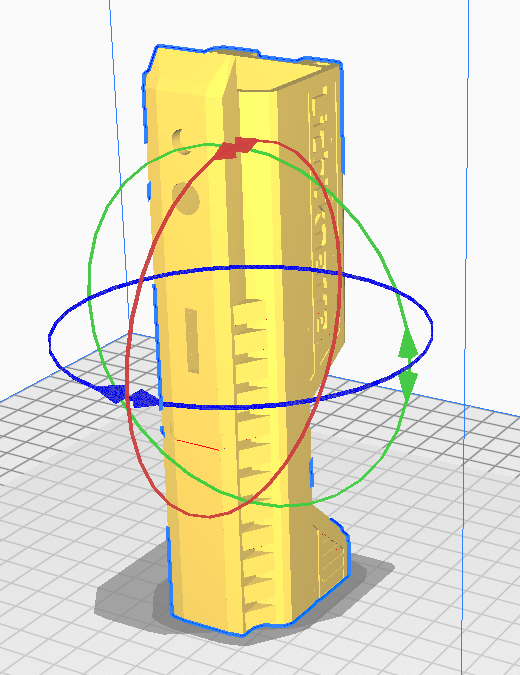
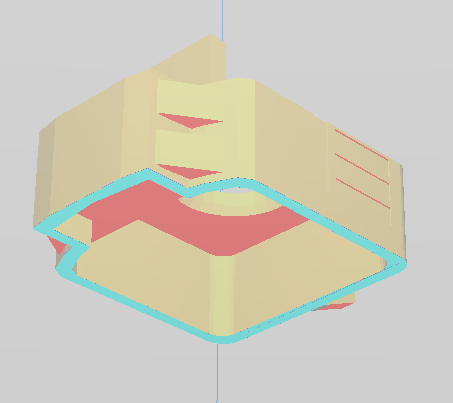
Gun case
Files
- GunCase.stl
Infill
100 %
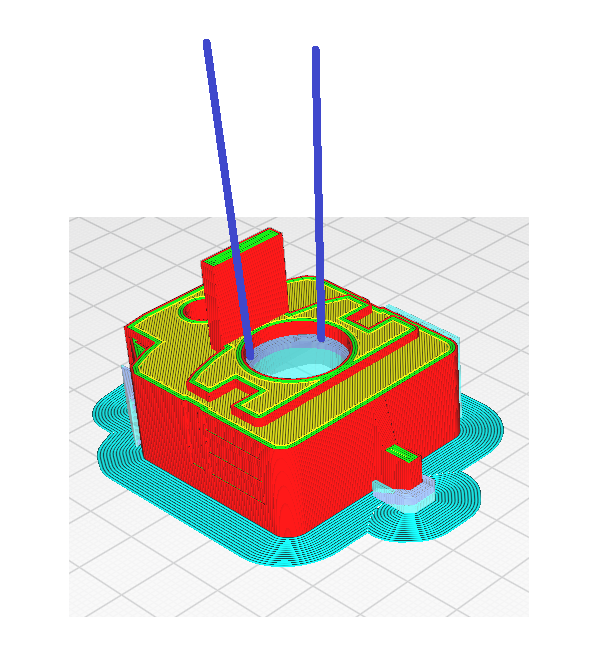
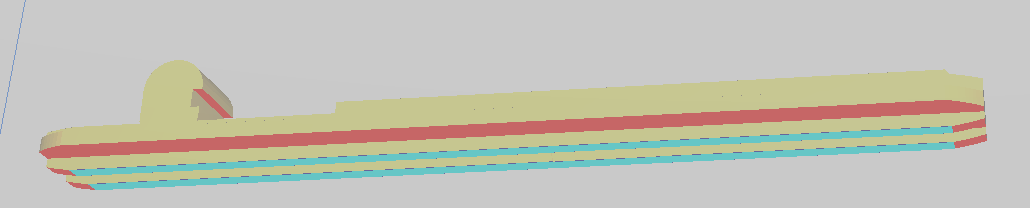
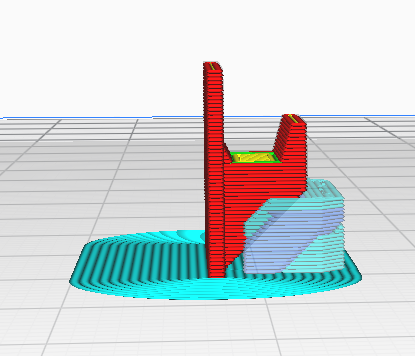
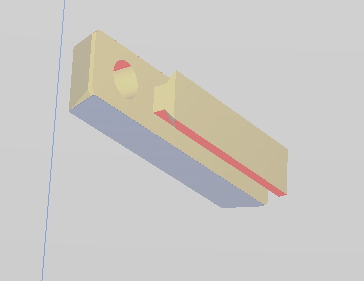
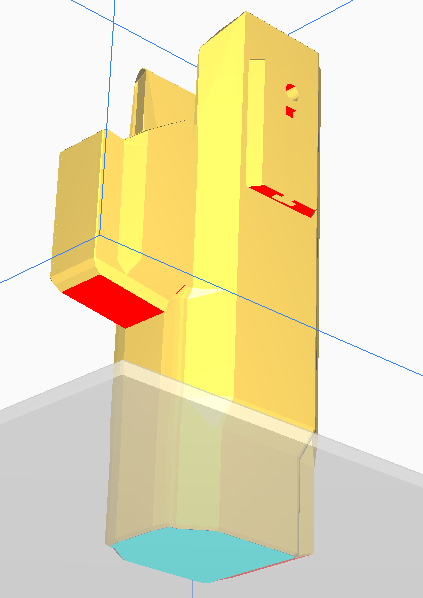
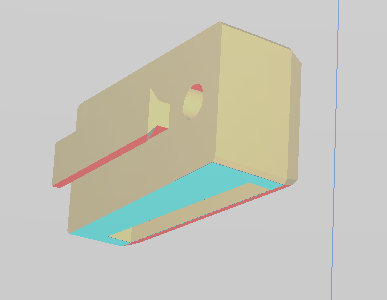
Placement
Make sure that everything lies flat on the print bed, as shown in the picture.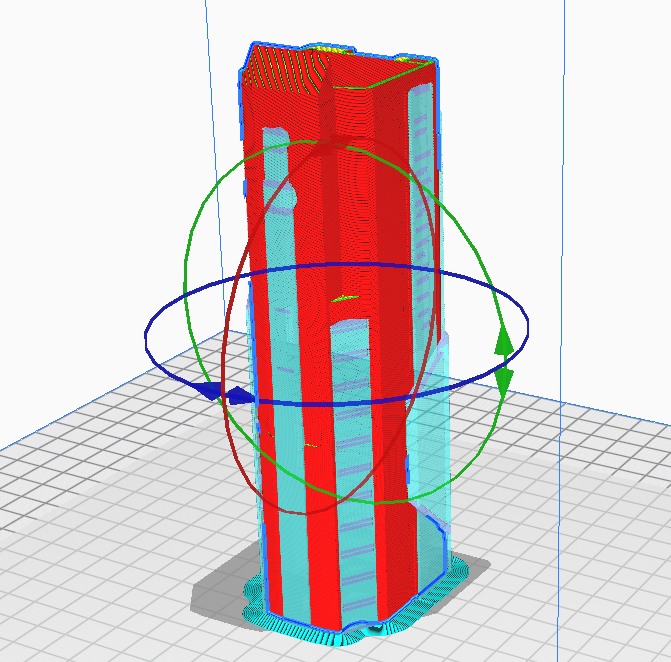
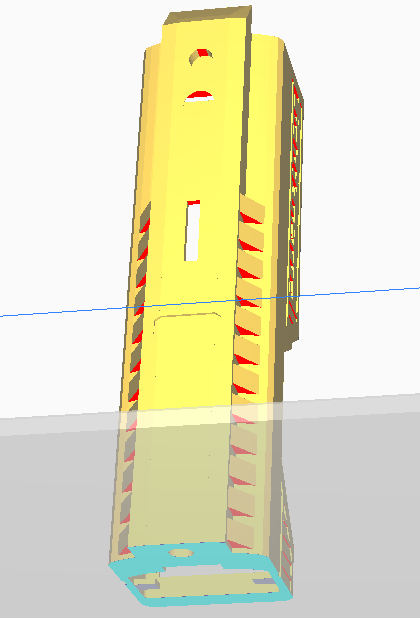
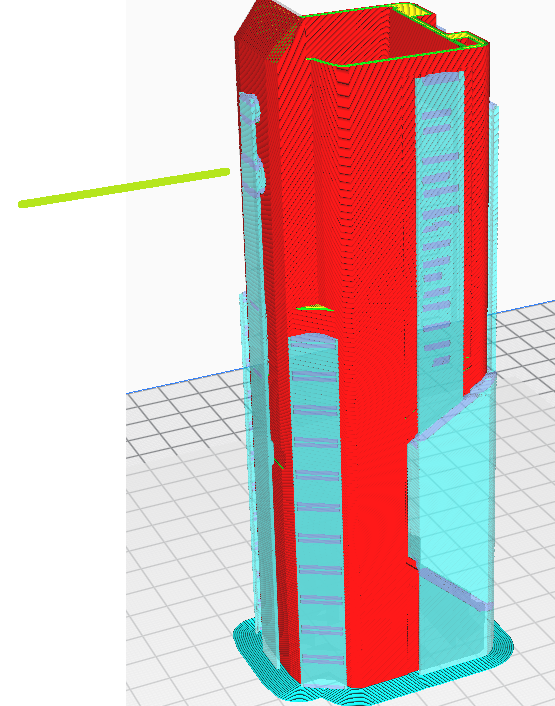
Remove support material
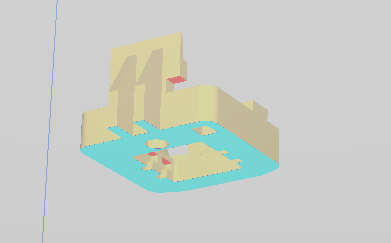
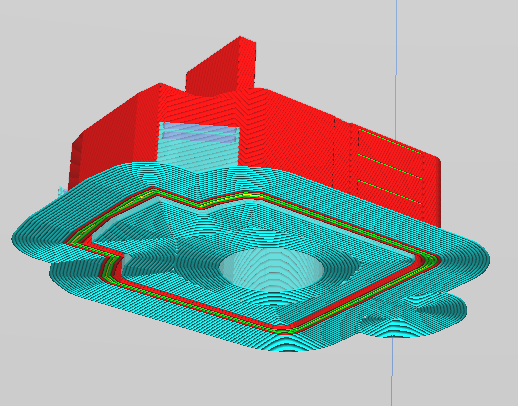
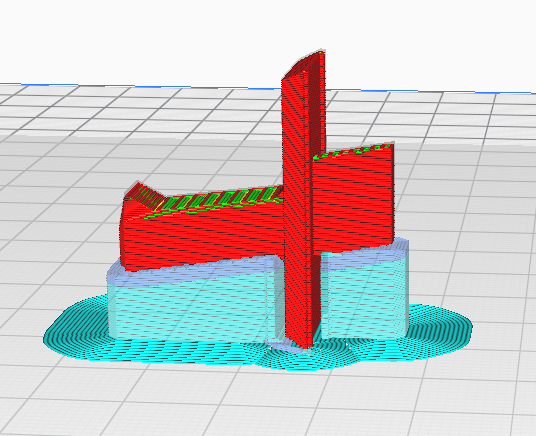
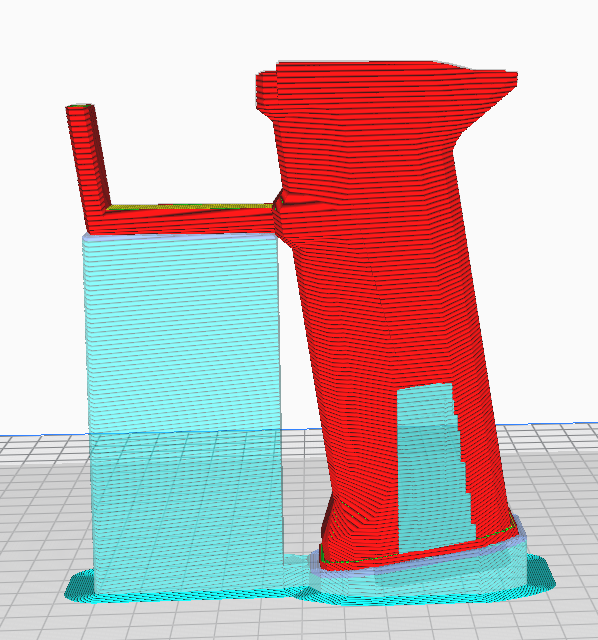
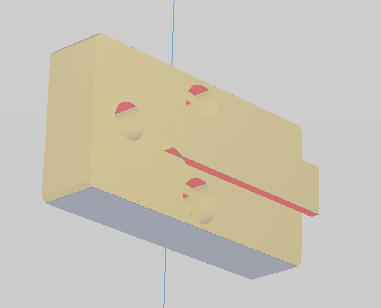
Saw into the support material where it is marked in the picture. You can then use the pump pliers to break out part of the support material. Then take a slotted screwdriver and hammer the support material down to where the green line is marked in the picture. You can repeat the process until all the support material has been removed. Be careful and do not cut into the gun case.

First clip off the support material from the outside and then use the screwdriver to tap into the hole where the green line is in the picture.
If the support material in the gun case, which is located in the gun trigger shaft, is then hanging freely, you can carefully wiggle it out so that it comes out of the shaft properly. Here the support material is in the pocket of the gun trigger shaft.
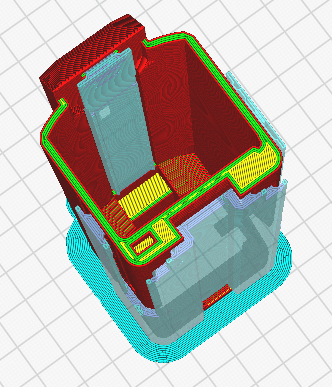
Good luck! Take your time with this stage as you will have to exert even pressure. Although not necessary, a rotary tool could come in handy to help loosen the material as well.
More Infos in the remove support-material section of this tutorial! Videos etc.
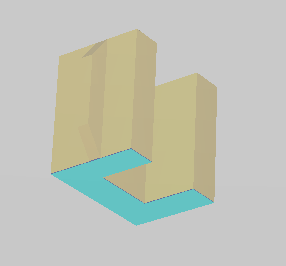
Back-Covers
Files
- BackCover.stl
- BackCoverNunChuck.stl
Placement
Make sure that everything lies flat on the print bed, as shown in the picture.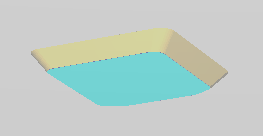
Back-Covers-Lock
Files
- BackCoverLock.stl
Special Cura-Settings
Infill: 100%
Placement
Front-Addon
Files
- FrontAddon.stl
- FrontAddonLens.stl
Placement
Remove support material
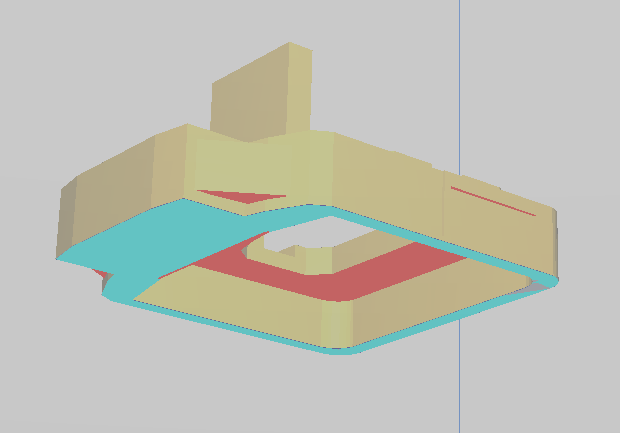
Clamp the lens add-on in a screw clamp and tap with a screwdriver and hammer exactly where the blue lines are on the picture. Do not use too much force and tap several times until the support comes off.
Pins
Files
- MagnetPin.stl
Special Cura-Settings
Infill: 100%
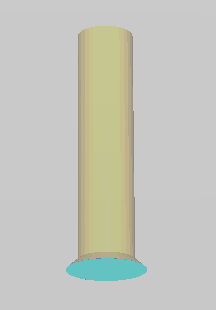
Placement
Info
If you don’t want to equip everything with magnets, you can print 2 pins (CHECK THIS) that can be glued in as an alternative. Take a look at the assembly video on the last page to see where magnets can be omitted and substituted with said pins.
LINK
Trigger: Finger trigger
Files
- TriggerFinger.stl
Special Cura-Settings
Infill: 100%
Placement
Trigger: Slide
Files
- TriggerSlider.stl
Special Cura-Settings
Infill: 100%
Placement
Trigger: Rubber-Band holder
Files
- TriggerRubberMount.stl
Special Cura-Settings
Infill: 100%
Support-Angle: 40°
Placement
Grip
Files
- GunHandle.stl
Special Cura-Settings
Infill: 100%
Placement
Grip mounting bar
Files
- GunHandle.stl
Special Cura-Settings
Infill: 100%
Material
PLA+
Placement
Holster
Files
- look holster folder
Special Cura-Settings
Infill: 80%
Placement
Remove Support
Here some tips for support removal:
Gun Case
Beware how deep you cut.
Side A Button
To cut the sides helps you to remove the support material without bending the joints.
Lens addon
Assembly
The following video should be watched repeatedly at .50% speed to understand how to assemble all your prints together. Tip: Be mindful of glue application and dry times, especially the finger trigger that could get stuck instead of sliding along the barrel. For the rubber band, any thin rubber should work and can be tied to size.
Aftermath
At the beginning the parts will be a little tight and the buttons will squeak. After a while, however, this will no longer be the case, the more you use the guncradle. If the buttons do not stop squeaking, you should sand them again till they fit without problems.